
Setup Shipping for Retail & Wholesale on Squarespace

Learn how to setup shipping costs for retail & wholesale purchases on your Squarespace site.
If you sell multiple items to retail and wholesale customers on Squarespace, shipping can get tricky.
Sizes, weights, dimensions, and quantities can vary greatly. Unlike Etsy, we can’t assign profiles to specific products.
When I first opened my wholesale site, shipping is where I got hung up. So I came up with this work-around to ensure I could get as accurate as possible when it came to shipping costs.
First, setup your retail & wholesale shops on Squarespace
If you haven’t yet, setup two different shop pages on your Squarespace site.
“TIP: Once you have your retail shop setup, you can easily duplicate this shop to prevent starting your wholesale shop page from scratch. Just be sure to add a password, adjust pricing, descriptions, and photos as needed.”
One will be publicly available. Have retail pricing. Have descriptions and information geared to a consumer. Have more lifestyle or in-situ photos to show the product in action. Maybe even suggested items.
The other shop page will be password protected (private). Have reduced pricing. Have descriptions and information geared to stockists. And have photos that are clean and show the product clearly; Think white backgrounds. Lifestyle shots are good here too.
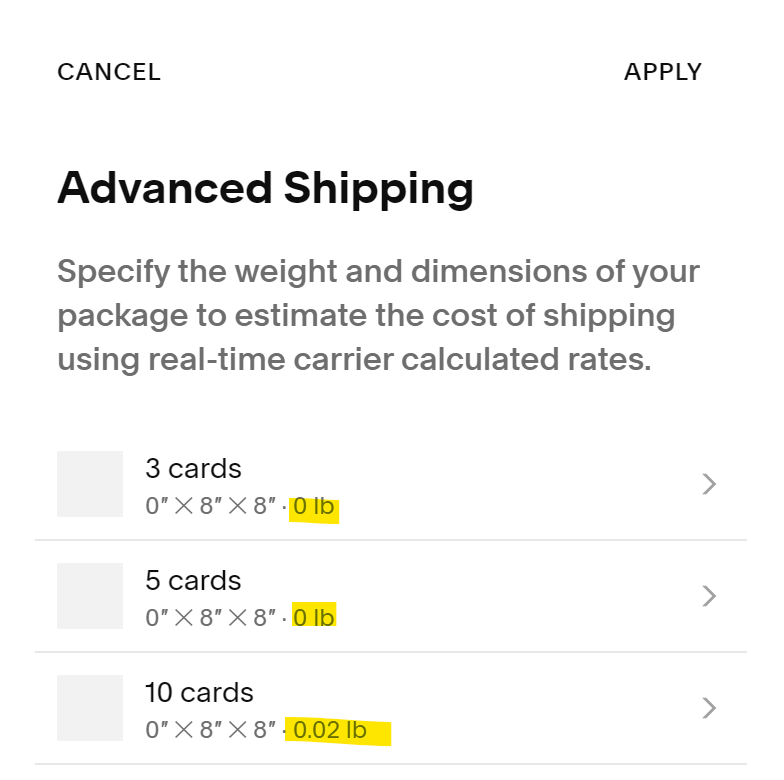
Find physical product weights under the Advanced Shipping section within the listing.
Get Familiar with Product Weights
For each physical product, Squarespace allows you to enter a weight for that product. The idea being it will calculate the shipping costs based on an accumulated weight of someone’s order.
If we’re shipping one item from our shop, then this will be a simple setup of shipping rates.
However, if we have multiple items that ship in different shipping categories (lettermail vs. parcel), we need to be a little more strategic with what we put into these weight boxes.
Before we get into a more complex shipping setup, we need to do some pre-planning first.
1. Categorize Your Product
First, identify your product lines and combine ones that are similar in shape & weight. I will use my catalog of items for example’s sake.
Product
Stickers & Bumper Stickers
Cards & Postcards
Enamel Pins & Patches
2. Identify Shipping Categories for Each Product
How does each one of those products ship? That’s the answer we’re looking for here.
Everything we ship, falls into a shipping category based on our national postal service; Lettermail, Oversized Letter, Small Packet, Small Parcel, etc.
Once we know what products we’re shipping, we can identify which shipping category they will fall in. Let’s base this off of shipping 1 of that item. Again, I’m using my own example below.
Shipping Category
Lettermail
Lettermail
Oversized Lettermail / Small Packet
Product
Stickers & Bumper Stickers
Cards & Postcards
Enamel Pins & Patches
3. Decide Where You’re Shipping
Where do you ship? Since shipping varies so much, write out how each of your product categories are shipped to the different destinations you ship to.
In my example, I ship to Canada (domestic), USA, and International. Therefore, I will need to clarify how each of those products will ship based on that destination. In the example below, I have split mine up based on that information.
If you only ship domestic, you’ll have a simpler table.
| Product | Shipping Category | Destination |
|---|---|---|
| Stickers & Bumper Stickers | Lettermail | Canada |
| Stickers & Bumper Stickers | Lettermail | USA |
| Stickers & Bumper Stickers | Lettermail | International |
| Cards & Postcards | Lettermail | Canada |
| Cards & Postcards | Lettermail | USA |
| Cards & Postcards | Lettermail | International |
| Enamel Pins & Patches | Oversized Lettermail | Canada |
| Enamel Pins & Patches | Small Packet | USA |
| Enamel Pins & Patches | Small Packet | International |
4. Get Rough Cost of Shipping
Condense the above table to only show destination and shipping category. Add pricing for each shipping category & include parcel & tracked to account for larger wholesale orders.
Refer to your local shipping provider for rates. Some of your historical shipping data might help you here.
Canada
Lettermail = $1.25
Oversized Lettermail = $1.95
Parcel = $10
Tracked Light = $15
Tracked Heavy = $18+
International
Lettermail = $3.25
Small Packet = $10
Parcel = $15
Tracked Light = $21
Tracked Heavy = $40
USA
Lettermail = $2.50
Small Packet = $7.50
Parcel = $12
Tracked Light = $16
Tracked Heavy = $22+
5. Assign Weight Based on Cost
With the rough costs of shipping for each item and to each destination, it’s time to assign weight ranges to them.
Once this table is complete, use this to setup your Shipping tiers in Squarespace.
See below for an example of my Canadian shipping tiers.
“TIP #1 : The more tiers you have, the more accurate you can get with pricing.”
“TIP #2: Smaller weight numbers will prevent huge gaps / jumps in shipping costs. Especially when it comes to the wholesale side”
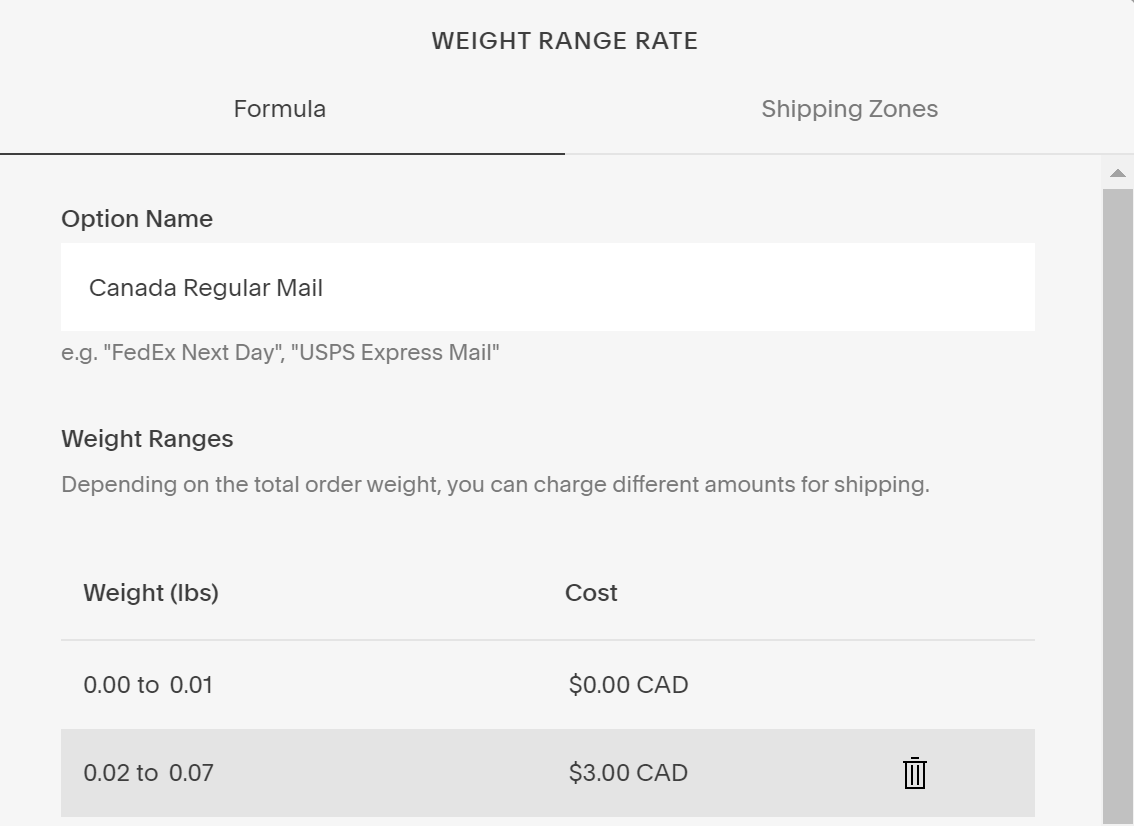
Canada
Free shipping = $0 = 0 - 0.01lbs
Lettermail = $3 = 0.02 - 0.07lbs
Heavy Lettermail = $6 = 0.08 - 0.10lbs
Regular Parcel = $9 = 0.11 - 0.16lbs
Med Weight Parcel = $12 = 0.17 - 0.21lbs
Heavy Parcel = $15 = 0.22lbs - 0.54lbs
Free shipping (due to volume ordered) = $0 = 0.55lbs+
6. Setup Weight Range Rates in Squarespace
Taking your table from above, head over to the Commerce > Shipping area of your site to setup your site shipping rates. Create a new Shipping Option.
Option Name: Enter this as your Destination. Click on Shipping Zones to set that destination.
Weight ranges: Add your weight ranges & prices from the appropriate table above.
Add New Shipping Option for other destinations.
Optional: Add Flat Rate shipping options to offer upgrades like Tracking or Expedited. Use your last Weight Range shipping rate as a stating point for these flat rates.

7. Apply Weights to Product in Catalog
From the exercise in #2, combined with the weights from #5, you’ll have a good idea of what product will fall into what weight/shipping category.
For Retail Catalog
With that info handy, head into your Squarespace retail catalog first and apply a weight that will allow it to fall into the correct shipping weight range.
If a customer orders 2, can you ship for the same cost or does the package get heavier and more expensive?
Calculate that and adjust item weight accordingly. You may also need to revisit your Weight Range Rate shipping options to adjust your range of weights. (It’s a fine balance!)
Example: I can send up to 2 patches for the same as 1 so I ensure that each patch is weighted at 0.035 lbs so that if 2 are ordered, they still fall into the appropriate shipping cost range. As soon as they order 3, the package gets heavier and the shipping costs increase.
For Wholesale Catalog
Enter weights into your wholesale catalog now. Keep in mind the product weight might need to be adjusted on this side, since stockists purchase more than 1 or 2 items at a time.
For example, a single item being sent lettermail weighs 0.02lbs in your retail catalog. However, a stockist might order 30 of that item. If the weight is 0.02lbs in the wholesale catalog too, it places their order in the wrong shipping category - either over- or under- charging them.
To figure out what shipping category a wholesale order might fall into, use a couple of previous orders as examples. On a sheet of paper, write out items ordered, quantity, and add up the product item weights you’ve setup. Check your shipping table to see what the order would have cost to ship.
Does it fall in the correct category? If not, adjust your product weights in the wholesale catalog accordingly.
If you need to, revisit the Weight Range Rate shipping options to add more tiers and adjust pricing. Keep in mind, this will adjust your retail shipping costs too!
Repeat for all products.
Trial & Error
This isn’t a perfect system and some trial and error will be needed.
For months after setting this up, I did have to continue to assess and adjust my shipping costs & tiers to ensure the most accurate shipping cost possible.
Shipping overages (and refunds), in addition to undercharges, did happen. Sometimes still do. But after implementing this method, I’m finding my shipping accuracy has improved dramatically.
Keep in mind everyone’s shipping structure and needs are going to be different. So do expect some adjustments until you find your shops’ sweet spot.
Good luck!
Let me know how this works out for you by commenting below.
Or, read by category
Art & Design | Small Business | Inspiration | Product | Spotlight


